Every day we offer FREE licensed software you’d have to buy otherwise.
ANALOG projects 3 (Win&Mac) was available as a giveaway on July 5, 2019!


The unique tools in ANALOG projects 3 allow you to play with light sources, hues, grain, vignetting, textures, blur and lens flare effects and create professionally styled images like a photo editing pro! ANALOG projects 3 gives you full control over every effect, which you can apply as a stylistic device to create your very own trendy look.
Main features:
- Professional SCA processing for the finest colour details;
- Scratch and sensor glitch corrector;
- Brand new presets calibrated by photographers;
- Can be used in various ways: Analog projects 3 works as a plug-in for Adobe Photoshop and Lightroom, and as a standalone application.
Please note: the program archive includes Mac version a well!
System Requirements:
Min. System Requirements: Windows 10/8/7, Prozessor Core Duo, 2 GB HDD, 1.280 x 1024 Pixels Screen Resolution, Graphic: DirectX-8-compatible, 128 MB, 32 bit colour depth; Mac OS X ab 10.7, 64 Bit, Prozessor Intel/G5, 2 GB HDD, 1.280 x 1024 Pixels Screen Resolution
Publisher:
FRANZIS Verlag GmbHHomepage:
https://www.projects-software.com/analogFile Size:
427 MB
Price:
$69.00
GIVEAWAY download basket
Comments on ANALOG projects 3 (Win&Mac)
Please add a comment explaining the reason behind your vote.

Now I have tried to download this program twice, and then unzipped the zip-file. Then I have tried to installed it, and just after running the setup file - NOTHING HAPPENS!!!
Checked the prosesses that are running on the computer, and there are than no setupfile running and after waiting forever(and still no file running in the prosseses on the computer) I look at the startmenu, and there is no software installed.... Then I look through the hard-drive, and there are absolutly no program installed on the computer at all.
I am running the latest build of Windows 10 (1903), and have no problems with my computer - but this software doesn't get installed when running the setup-file. Have even tried to install it by "run as administrator", but still no software will install on my computer....
What is going on?
Any other users with the same problem?
Can anyone give me an answer to this problem...?
Regards from
Frode Reppe
Save | Cancel
Frode Reppe,
>"and then unzipped the zip-file"
How are you unzipping the zip-file? Are you (a) taking the contents of the zip-file and placing them outside the zip-file into a regular folder, or are you (b) opening the zip-file, and then clicking on the setup file in it? It is very common for people to do the (b) part instead of the (a) part. Make sure you do the (a) part, otherwise the Setup.exe file cannot access the other parts it needs because they are in the zip-file.
Windows has the ability to open a zip-file (almost) as if it were a standard folder, but it is only for access to the contents (to copy to somewhere else). You cannot expect it to work the same as a regular Windows folder.
I would like to hear back if that is the problem or if there is some other issue. Thanks in advance.
Save | Cancel
Frode Reppe, I've had similar problems with other giveaways. The cause was my anti virus. Try switching yours off temporarily.
Save | Cancel
This seems to be like Nik Collection on steroids.
Apparently, this pgm is around four years old. This creates its own problems. Then there's the undo and PS filters thing.
So is it worth installing for non-professionals who might just want a bit of fun with photos?
Save | Cancel
BradS, IMHO yes, as it's very easy to play with and if you don't see an improvement quickly you can just move on...
Save | Cancel
You start out working on an image by selecting a large thumbnail preview in several Franzis apps, with ANALOG projects specializing in retro looks. The copy I have installed dates back to a giveaway in September 2017. After v. 3, given away again today, I think Franzis merged the capabilities in ANALOG projects into their COLOR projects app -- the latest giveaway for that [that I'm aware of] is COLOR projects 5 elements.
Franzis apps tend to give very good results, but are generally considered not the most user friendly software out there. They have light weight installs -- I just copy the program's folder from one copy of Windows to another and activate it there [if needed], no installation needed. I also usually copy the plug-ins to the Franzis program's folder that it applies to, then add that plug-in path in image editing software, or add a shortcut to those plug-ins in the image editor's plug-in folder, because I've had problems getting them to work otherwise. Once on their mailing list Franzis does occasionally have some very good deals -- a recent sale offered an upgrade to many of their current pro versions for $20 each.
With the exception of their Denoise & Cutout software, I think most all Franzis apps [like ANALOG projects] are best used once the image has been otherwise optimized in regular image editing software. The better the image you feed a projects app, the better the result it'll give you, and Franzis apps don't include the tools to optimize an image. Because of that I don't see much purpose or reason to use them with images in RAW format... RAW files include all the sensor data so that you can develop it into an image yourself, rather than letting the camera do it -- if you're not interested in going that extra mile, developing your photos in something like Lightroom, let your camera do it and use the jpg images it'll give you -- they'll be better quality than what you get out of most all software that doesn't specialize in developing RAW images.
ON1 makes an app for RAW image developing called Photo RAW. They've taken a portion of that app and made it into a standalone app called ON1 Effects, that works similar to ANALOG & COLOR projects software. It's easier than the Franzis software in some respects, but not others, and while it gives you more editing options, it's still not a full image editor. I've been using ON1 Effects 2019 to correct as possible a bunch of 40 year old color photos that are very badly faded to red or yellow tints -- it's doing better than I could manage in P/Shop CC. I posted a link to get ON! EFfect 2019 for free in the forum a while back, & while it still works, I'm afraid that if I post it here, in the comments, it wouldn't work for much longer.
Save | Cancel
If it's from FRANZIS, It's Gotta Be GOOD!
Save | Cancel
Thank you for sharing your programs. ANALOG projects 3, as are all of your programs, fun and impressive with their results. I would not be able to enjoy these if it were not for Giveaway of the Day.
Save | Cancel
The installer doesn't work. Under my Win 7 x64, launching Setup.exe just brings the UAC dialog (that I accepts of course), then after a while, Windows shows another dialog telling that "this program did not install correctly". It proposes to retry using the recommended settings, but again, nothing shows up. Tried several times, even after a fresh reboot, but without luck. It's probably the first time I try to install a program that is unable to show at least the "installing" window. Badly programmed ?
Save | Cancel
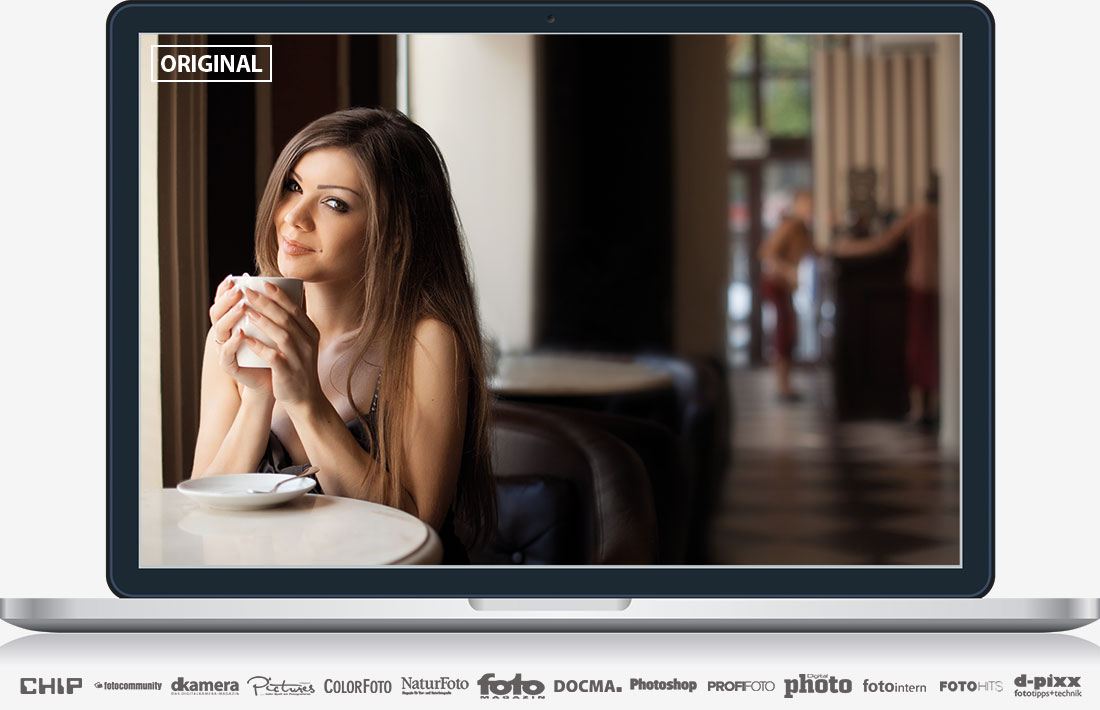
Just a few examples from one original:
https://ootjegotd.stackstorage.com/s/xwXu6warbizU3aQ
Save | Cancel
Hi, when using Presets in this Program - points worth remembering: Each time you open an Image and decide on particular Preset, but further try to alter something or adjust settings in your right Pane to view if you like it, or need to carry on till you reach desired result - there is NO 'Undo' Button, or Arrow on TOP in it's Tool Bar Options, or alternatively bottom corner of that Console!! Instead - you have tiny (I mean tiny!) 'reset' icons/buttons in a shape of circular arrows - both inside Presets themselves in your left Panel, or next to adjustments bars on your right. 'Reset' will take you to default state of any settings and your Image to square one within Presets.. So you either remember to use them immediately after each change (thus undoing your LAST action), or end up undoing the lot at once later! Yes, you can create 'Restore Points' from top Task-bar choices which will give 1 undo.., but tell you these Restore Points take a lot of Memory to keep and work with..
Here, I have to mention also 'save as' format choices!.. My preferred one (File/Save final image/Save) from past experience was TIFF 16-Bit for smaller 'portrait' photos, it'll make them bigger in dimensions but much larger in size (eg, original image of 374x498, size 25KB will ended up as 500x666, size 2.5 MB), so it's worth remembering!
Other saving formats - again matter of practice what works, what doesn't with given options.. Another advice to add would be to remember to save final Images to Desktop (in case they came from some Photo Folder) to avoid accidental loss of original.
Finally - can anyone understand why make the whole process of creating lovely photo Images and saving them - so annoyingly complicated and fiddly, turning simple joy to some hard slog?? If you're a first time user - that's basically what you'll get with any FRANZIS Program, as interesting as they all are, I'm sure. Time FRANZIS introduced that Undo Button/Arrow to it's obvious place (TOP Guys, please!) and added few regular formats to saving Options?? Simplicity before 'Uniqueness' can truly work like a charm!
Save | Cancel
fran, Perhaps others had already claimed the easier methods ? Thus requiring Franzis find work arounds that don't infringe copyrights or patents. Just a guess for one possible answer.
Save | Cancel
BobbyA,
Copyrights & Patents to..use UNDO Button??:)), please!
Save | Cancel
fran,
"... can anyone understand why make the whole process of creating lovely photo Images and saving them - so annoyingly complicated and fiddly..."
That's Franzis. Seriously. Every pro review I've read of their software, e.g. their Denoise app [which I bought], mentions other software that's easier to use -- that was always their complaint with Franzis.
Save | Cancel
mike, I think their deconvolution sharpener (Sharpen Projects) is easily the best one I've seen (and I've purchased others and trialled many), also I prefer B+W Projects to any of the other options (and I've played with a number). I think it's really a case of spending a couple of days getting your brain around the tools (I wrote a long post below to help people get past that), then they are easy to use. (This is also true of cameras.)
Also it depends whether you are looking for simple or lots of control, I think their approach does that quite well (simple presets plus ability to tweak all the parameters), but other tools offer very different control approaches and people like different things, partly depending on how often they use something.
Of course there isn't much money for people reviewing anything these days, so unless they are big fans of a subject they don't spend much time on things, don't use all the features and miss stuff. This includes magazine articles, and I don't mean just on photography - in the U.K. I've seen a report Amateur Photographer pay £150/1000 words, for example.
Save | Cancel
Couple of questions and suggestions regarding the plugin functionality.
Suggestion: If the installer can't find photoshop to install plugin, then prompt for more information (like drive or worse case offer to browse) before giving up.
I installed Analog Projects 3 on the D: HDD, but Photoshop CC resides on the C: SSD. Said couldn't find PS.
Question: Having to install plugins manually I noticed it does not appear to include a Filter plugin (.8bf) file,
only an Export plugin (.8be) file. Why ? Did I overlook the other file somewhere ?
Save | Cancel
BobbyA, No, you only get an Export plugin, you need v5 or later of Franzis projects software to get filter plugins, and this hasn't gone beyond v3.
Save | Cancel
I assume it's the same version (v3.21) given away here on September 15, 2017?
For comments on that giveaway: https://www.giveawayoftheday.com/analog-projects-3/
Save | Cancel
is it just me, or maybe someone else get 404 error, page not found
Save | Cancel
It's a bit of fun and this is the latest version, although perhaps more as there hasn't been an update for some time.
Anyway here's my latest comments on it (I have it already)...
As usual a complicated registration process if it's your first time with Franzis. It's a program from 2015 but also the latest version, as they seem to have stopped updating it. It also comes with a Raw file import library from 2014 so straight-out-of-the-box won't support more recent cameras. However you can just copy a later version of FreeImage.dll over the one in the program's directory to help with that (although it's still not completely up-to-date). You can get this from SourceForge or just download:
http://transfer.franzis.de/projects/RawImageDllprojects_Win64.zip
and replace "C:\Program Files\Franzis\ANALOG projects 3" with the dll file it contains. (You may need to rename the original file first.)
If you're not running the 64-bit version of Windows, i.e. your computer doesn't have a directory "C:\Program Files (x86)" then the file you want for upgraded raw support in 32-bit Windows is: http://transfer.franzis.de/projects/RawImageDll_projects_Win32.zip
Note these are still not completely up-to-date, so recent cameras may not have Raw support and you have to use the JPG or make a 16-bit TIF file in your favourite Raw processing software. You may never bother with Raw with this tool anyway as it's not critical.
If you have a Mac you'll need to get the OSX version of FreeImage from SourceForge and replace the existing one, wherever it might be.
Here's my getting-started instructions on using it:
Load a picture, play with the canned effects on the left side, play with the Film Type on the right side panel (which should start on the “Finalise” tab). You can then mess with assorted settings in the middle of the panel and at the bottom of the panel you can select toning options.
Changing to "Expert" in the right panel you can add filters from the list at the top, select them in the middle of the panel and tweak their effects at the bottom (may need scrolling down). (I'd ignore that until you are comfortable using it.)
The boxes at the top of the left panel just filter the effects that are listed in the panel, so ignore them initially. On a faster computer you can use the Eye icon on the toolbar to disable the preview mode and show the final image in the main window, which IMHO is worth doing.
Press and hold the right mouse button on the image to see the "before" image. Double (left button) clicking on the image zooms you all the way in/out (one after the other). A mouse scroll wheel also zooms. When not zoomed fully out the left mouse button can drag the viewing area around the image.
When saving the final image note that the first dialog, where it asks for the title, is going to write that over the image, it isn't the file name.
The main disadvantage is the lack of Undo operations, you can set restore points though (which appear in a timeline).
Note that although they do add a Photoshop plugin it's under File->Export, not Filters, which IMHO doesn’t really count. (You need their v5 products to get "real" Photoshop filters.)
The thing to get your brain around is it a huge pile of image processing tools, which are gathered together into presets in the left pane. All those options do is select a bunch of processing tools (as shown in "expert") and choose options for them, so they are infinitely tweakable in the right pane.
P.S. Note it's not high-DPI (i.e. 4k/5k monitor) friendly. I'd recommend, on WIndows 10, that you right mouse button the program, select Properties, then the Compatibility tab, click "Change high DPI settings", tick "Override high DPI scaling..." at the bottom of the next dialogue and select "System (Enhanced)".
Save | Cancel
I'd like to add some more info to one paragraph (and editing isn't allowed):
"The boxes at the top of the left panel just filter the effects that are listed in the panel, so ignore them initially. Although one use you might want to play with is, when you run down the presets looking for ones you like, you click the * beside them to mark them as favourites. When you're done click on favourites at the top to just show those (click "All" to return to seeing all the presets). This does mean with the next image you'll have to deselect ones that are already selected, if they aren't making the cut. Of course you could also use it just to slim down to a few general favourites."
Also note the Eye icon is one of the first to disappear if the Window is too narrow to show everything on the Toolbar. If you don't see it make the program's window wider.
Save | Cancel
JohnL,
Thank you, John, for your very helpful reviews.
Regards,
consuella
Save | Cancel
JohnL,
"It also comes with a Raw file import library from 2014 so straight-out-of-the-box won't support more recent cameras. "
Purely FWIW, why import RAW images into Franzis software like ANALOG projects? The RAW format includes all available sensor data to allow you to do a better job turning that data into a photo [i.e. developing] that what the camera will do automatically when it gives you a jpg image. Your camera OTOH will most likely do a better job developing your images than non-specialized software, because its internal software has been tuned to the camera's characteristics, so if you're not going to process your RAW photos in something like Lightroom, just use the jpg your camera gives you. As a plus it's less hassle & less disk space used.
Ideally if you're going to use RAW, develop those images in specialized software, then optimize the results further in a full image editor, e.g. PaintShop Pro or P/Shop or The GIMP, then feed those images into something like ANALOG projects. That way you can get the full, usable dynamic range of a photo, correct color & lighting as needed, along with any other enhancements. The better the photo you feed something like ANALOG projects, the better the results it can spit out.
Save | Cancel
mike, JPEG compression works by throwing away the data it thinks you won't notice (you can usually choose how aggressively it does that). Plus is only 8-bit anyway. Starting with a 16-bit TIF or a (typically 12-14 bit) Raw file means you can stretch it further in any direction and not find there's no data to work with when you get there. Although most of the time a JPEG will be fine with this program, especially if the JPEG isn't compressed that much (so 80-100, or 8-10, on the scales many JPEG savers use, or "fine" in camera, although it's quite image content dependant).
Save | Cancel