Every day we offer FREE licensed software you’d have to buy otherwise.

Giveaway of the day — HDR projects 6 (2018)
HDR projects 6 (2018) was available as a giveaway on December 24, 2021!
Note: Franzis changed the title of the product. HDR projects 6 was formerly known as HDR projects 2018.
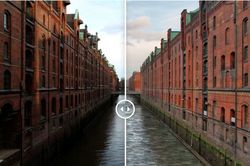
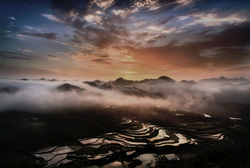
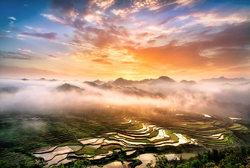
HDR projects 6 transforms your photos into Ultra-realistic masterpieces. HDR projects allows you to get the best from your photos and practically does all the work itself. Benefit in several ways: edit your images without operating a single controller and still create images with a sharpness like you’ve never seen before!
- NEW: 5 creative image styles ensure quick success;
- Works with bracketing and individual images, RAW and JPG;
- Optimum image quality: defined HDR images without image noise.
System Requirements:
Minimum: Windows 10/ 8/ 7 (x32); Processor Core Duo; 2 GB HDD; 1.280 x 1024 Pixels Screen Resolution; Graphic: DirectX-8-compatible, 128 MB, 32 bit colour depth
Publisher:
FRANZIS Verlag GmbHHomepage:
https://www.projects-software.com/hdr/hdr-projects-6File Size:
236 MB
Licence details:
Lifetime
Price:
$69.00
GIVEAWAY download basket
Comments on HDR projects 6 (2018)
Please add a comment explaining the reason behind your vote.


Would have liked to get this software but I did not get the usual link, ther's been lots of missed days without email notification containing links in the past month.
Save | Cancel
did the install as directed, now it keeps asking for a serial number. What do I enter?
Save | Cancel
Art,
All the information you need to register is in the readme text file. Easiest way>> Do the following:
1. Go here: https://www.franzis.de/account and sign up for a new account. The info is in a foreign language so you'll need to translate it by using translate.google.com. If using Google Chrome browser, it will ask you if you want the website translated, select your language.
Fill in the in info and they will send an email for you to verify it's you who signed up for a new account.
Now you have an account at Franzis with username and password.
Now you can run Setup.exe and follow the steps in the readme.txt file.
The key is signing up for an account if this is your first time installing any Franzis software.
Once they send you a key to your email, they, Franzis, will also store your key info forever on their website under your account. It's easy peasy.
Save | Cancel
Art,
If none of what I said helps, go here and download the pdf file instructions on how it works:
https://www.projects-software.com/wp-content/uploads/2015/07/registration_process.pdf
Lastly, once you get the registration code, you will be asked to enter it twice. The first time is to get the Setup running and installing and the second time is to actually register the program. Like I said in my first post above, sign up for a new account on the website I gave you. Franzis does a few giveaways every year so the next time you decide to install another app. it will be a lot easier because you already have an account at Franzis.de
Save | Cancel
Thanks again Franzis for offering an update to this amazing software, once again with the lifetime license. Is there a changelog available to show how this differs from the versions offered previously?
I have HDR Projects v4 and v5 installed. Next to Irfanview, this is this is the software I use more than any other when fixing or tweaking my pictures. While I do not have anywhere near the level of expertise that JohnL provided in his earlier review, I suspect that there are many others who use the software the way I do.
I have not taken bracketed photos which can be used to create the true HDR masterpieces we see in the examples. The only thing I've used is the option to process "HDR from a single image", which is the first option in the first drop-down menu. From there, there are several dozen optional presets to choose from. You can even have the program quickly process your image through ALL of the presets (in lower resolution) then look through them to choose the one or ones that look best to you. From there, you can go back and process the image using only those presets, but in full resolution.
Are the results as jaw-droppingly stunning as true bracketed HDR photos? Of course not. But if, like me, you have thousands of old photos taken with point-and-shoot film or digital cameras, often in poor lighting or with a flash that overly brightened the foreground subjects while leaving background objects dim to the point of invisibility, the results can be impressive. I've used HDR projects 4 & 5 to process countless shots where you couldn't even make out things in the background, and turn them into vastly better versions, where background scenery, objects, and people are not only visible, but look decent, with good color.
I certainly will install this upgrade, but would like to know what the differences are between v5 and v6 (previously HDR Projects 2018). I kept v4 when I installed v5, but having used both in the way described above, I couldn't really tell you the difference between them.
Save | Cancel
Joe Blow, Alas the handy comparison tool has gone from their website. However you can look at the new features they listed for v6 (aka 2018) in 2018:
https://web.archive.org/web/20190122055610/https://www.projects-software.com/hdr/hdr-projects-2018
Save | Cancel
Unlike the v.5 that was previously given away, the Photoshop compatible plugins are not included -- I used Universal Extractor to expand the files in the setup program to verify this. That matters because while Photoshop can open files you HDR projects saves in an HDR compatible format, a great many image / photo editors cannot. That can hurt a little bit since HDR projects 6 is not a full editing app, and when you can't import the full HDR image you have make do with a version of the HD photo that's been converted to a normal, non-HDR image. You're probably going to save the HDR photo as a regular image file anyway, but the work you do on the full HDR image in your editing app can have an effect on what that converted photo looks like.
dummies[.]com/article/home-auto-hobbies/photography/general-photography/hdr-photography-choose-a-file-format-181040
HDR projects 6 is much larger than v.5, at ~450MB, since it includes 82 texture files. It also seems to move away from HDR projects earlier focus on [IMHO sometimes garish] photo FX, to become more serious HDR, and functional software. Doing so may have made it harder to use, with more available options. You'll probably want to set the compatibility on high DPI displays: Properties -> Compatibility -> Change high DPI settings -> Override... checked -> System or System enhanced.
Installation follows the standard for Franzis software giveaways... use your established Franzis account email address, sign in, and get the activation info via email. Once you enter those numbers in the setup wrapper the real installation program is unpacked in the User's temp folder -- copy & save that if you want before setup proceeds. I normally install these Franzis apps in a VM [Windows sandbox will work], since like today's giveaway they often include Microsoft C/C++ runtime installations -- I find these usually highly redundant [check the size of the Windows\ WinSxS folder], so just copy the program's folder from the VM, run & activate it. The app will add the files/folders under C:\Users\ that installation would otherwise add.
The market for less expensive point & shoot cameras has pretty much evaporated, while the price of entry level DSLRs has dropped -- you can usually find Canon cameras comparatively cheap, especially remans. As more people have cameras that can take bracketed photos, HDR has grown more popular, and you can find all sorts of info, How-To articles etc. online. The short explanation is that in difficult lighting situations combining the data from 2 or more photos shot at different exposure settings can produce a more balance photo, without portions being blown out [too bright] or too dark to see anything.
Save | Cancel
mike, You need the Pro version to get the Photoshop filters...
Std:
https://web.archive.org/web/20190122055610/https:/www.projects-software.com/hdr/hdr-projects-2018
Pro:
https://web.archive.org/web/20180613142528/https://www.projects-software.com/hdr
(I have the Pro version of 2018 so didn't know the filters were missing in Std BTW.)
Save | Cancel
After complete installation I can't get past the software saying Initializing System. Can anyone help me with this issue please.
Save | Cancel
MrMusic, Reboot or install again are the only things that come to mind I'm afraid...
Save | Cancel
MrMusic,
It would help if you mentioned what you installed this software on like was it Windows 10 (x64) how much installed ram, video card, CPU @ what mhz, etc.
Save | Cancel
I´ve been using HDR 5 for some time now. I can´t seem to find the lens correcting setting ( barrel / pillow ) which used to be in the RAW editor module which seems to be missing from this version. Any body know where i can find it on this version of HDR projects?
I use a Sony Alpha A6000 and I always need to use this function to correct the barrel distortion from the lens. Light room and photoshop do this automatically, but with HDR projects this needs to be done manually.
Save | Cancel
Mike, They say it has Raw input so I'm not sure about this, I don't remember the feature at all?
Save | Cancel
JohnL, - I finally figured it out. HDR projects version 5 which was given here a while back was the professional version. This version is not the professional version therefore it does not have the RAW processing module. As simple as that. I can´t correct pillow / barrel distortion with this version. Reverting to V. 5
Save | Cancel
Mike, Good luck!
Save | Cancel
Thank you, JohnL, for doing such a concise and helpful review of this software!!! Really appreciate the time you took to go into such detail about the program. You obviously have advanced experience with this, and other FRANZIS programs/plugins, and no doubt your experienced review will benefit many people who read it. :-) Happy holidays! -cfguy100
Save | Cancel
Cfguy, Concise-ish I think, but you're most welcome. I hope you and your family have a great time!
I actually do use this, and/or the 2018 version of Aurora, for HDR.
On Franzis I think their two stand-out tools are Sharpen Projects Pro and Black and White Projects Pro, but their HDR tool is good too and I like to help people get up to speed with it, as it can be a bit confusing at first.
Save | Cancel
It's Christmas Eve, so I'm just cutting and pasting my previous comments on HDR Projects 5, so just think 6 when you see a 5. (I usually spend much too much time updating and tweaking my comments on Franzis' software.)
Oh and I'd like to wish a A Very Merry Christmas to all that are celebrating it!
"High Dynamic Range" is referring to enabling you to see more of the brightness range in the original scene. Cameras can only capture 12-14 stops of brightness (outside that range you get white at the top end and black at the bottom). What the camera's exposure system allows is for you (or it) to choose what brightness level that range is arranged about.
You can have 20 stops of brightness in a scene, so whatever exposure you choose a lot of the detail won't appear (you should get everything on a dull day with 8 stops of DR in the scene though). However by taking 3 (say) 14 stop images separated by 3 stops you get information for 20 stops of brightness (so for the Sunny Window in the dark room you have a shot showing what is outside, but that shot won't show what's inside, it will be mostly black; but you have another shot with the interior detail and the window is white). The HDR software then chooses to use the bright detail from the first image and the dark detail from another. It must map that range onto the 8 or 10 bits of brightness your monitor supports (or whatever your printer allows, etc.), but you still see a lot more Dynamic Range from the original scene. One issue is making it look natural, although some people like more unnatural looks, that's for the photographer and audience to debate (personally I'm not a fan of overblown HDR effects except in rare subjects).
To clarify shooting at +/- two stops means with a shutter speed 4x and 1/4x the correct exposure. Don't adjust the aperture as that will change what is in focus. For three stops it's 8x and 1/8th.
So for example three images at +/- 3 stops could be 1/60th, 1/500th, 1/4000th
or five images at +/- 2 stops: 1/30th, 1/125th, 1/500th, 1/2000, 1/8000
(where the centre of the group is the correct exposure).
Often three images at +/- 2 stops is fine, depends how much detail is very bright or very dark in the image.
It's best to use a Tripod (or random bit of scenery to rest the camera on) to shoot the bracketed images, but if they are shot close together (many cameras have bracketing options that wull shoot the images in a short burst, or even HDR options where you can choose to keep the original images), ideally with stabilisation in-lens, in-body or both, then you can still get good results. Most HDRs I've done were shot hand-held.
I really like the Franzis Projects tools and some are quite excellent (their B+W converter is the best I know and Sharpen Projects is again excellent once you get away from its default attempt), so I always try to see if I can help people get over the initial learning curve. (Registering if you haven't done it for a Franzis tool before is also an adventure, but the tools are good IMHO.) I like their HDR tool (which you can easily use by taking three bracketed exposures, the correct one and typically ones at plus and minus two stops, allowing you to overcome the limited range of brightnesses cameras support in a single image) and think it is well worth installing. Another free option used to be HDR Efex 2 which is part of the Nik Tools which were Google and are now DXO, and were available as a free download when they were Google, so might still be around. Note the Nik tool is a Plugin but you can just (on Windows) drag a link to the HDR Efex 2 .exe to the desktop and go from there (although IIRC it just saves the result in a "standard" location rather than offering a choice). If you have Lightroom that also has built-in HDR support.
Note that HDR Projects 5 has a lot of options and you may need to play around a bit to get a natural looking HDR, unless you fancy doing something with a more unnatural look (although some people are not fans of highly processed HDRs others like the effect).
Oh and while I am doing a bit of a quick start guide don't forget to check out the manual, especially the stuff on Ghosting removal.
As I said it's a bit of a pain to register (unless you've done one of their tools before) but persevere and you'll get there.
You can either combine multiple images into an HDR or just select a Raw file (if you have one) and work from that (it won't be as good, but a fair bit better than the JPEG).
With the HDR software in today's give-away you have an additional step beyond just opening a photograph, you have to select the images to combine and choose some options. I was very pleased to see it has support for Raw file import, although as an older version I don't know how it will do with the very latest cameras (but see at the bottom for a partial solution to this).
Once you’ve imported the images it works in basically the same way as the other Franzis Projects software.
The thing to get your brain around with the Projects software is they are a huge pile of image processing tools, which are gathered together into presets in the left pane. All those options do is select a bunch of processing tools and choose options for them, so they are infinitely tweakable. HDR Projects adds a multiple image merging option on top.
After you've loaded the image(s) you want to work with you can then play with the canned effects on the left side, play with assorted things on the right side panel (which should start on the “Finalise” tab). I'd go with the defaults in the "HDR Preparation" dialogue initially.
Once you are happy with that changing to "Expert" in the right panel (entirely optional and can be ignored) means you can add filters from the list at the top, select them in the middle of the panel and tweak their effects at the bottom (may need scrolling down). (The options on the left are just choosing and configuring a bunch of these options for you.) I'd be inclined to ignore this for quite some time and you never have to use it.
The boxes at the top of the left panel filter the effects that are listed in the panel, so ignore them initially. Later you can use the favourites option to make a short list of presets you prefer (generally or just for the current image).
When saving the final image note that the first dialog, where it asks for the title, is going to write that over the image, it isn't the file name. The main disadvantage is the lack of Undo operations, although you can save Restore points.
I literally spent 90 seconds working on an image and was really quite pleased with the result. If you don't mind the learning curve and fancy playing with HDR I'd recommend it.
Oh, and as advertised above - to add raw support for more recent (although not very recent) cameras:
Usually the GAotD releases come with an old Raw file import library (e.g. from 2014) so straight-out-of-the-box won't support more recent cameras. However you can just copy a later version of FreeImage.dll over the one in the program's directory to help with that (although it's still not completely up-to-date).
Look in "C:\Program Files\Franzis\HDR projects 5" and see it has an old version of FreeImage.dll, which is the library that decodes Raw images from your camera (you don't care if you only plan to use it with JPEGs). I replaced this with the newest version I have (once I've shut the program down so don't have a sharing error) which is:
FreeImage .dll 6924,800 .a.. 26-02-19
Alas usually you can download later versions from Franzis, but the downloads haven't been updated so you have to go to:
https://freeimage.sourceforge.io/download.html
and download the DLL (second link down the page)
Unzip the archive and choose the correct copy (x32/x64 - if you're running the 32-bit version of Windows your computer won't have a directory "C:\Program Files (x86)") of FreeImage.dll from FreeImage\Dist (which is 3.18.0.0, same as the one I used). I did install and test this exact file and it does work with supported cameras. You don't need the archive afterwards.
Note these are still not completely up-to-date, so recent cameras may not have Raw support and you have to use the JPG or make a 16-bit TIF file in your favourite Raw processing software (or just try 3-5 bracketed JPGs).
If you have a Mac you'll need to get the OSX version of FreeImage from SourceForge and replace the existing one, wherever it might be.
Good luck and enjoy!
P.S. If it doesn't look good on your high-DPI display (i.e. 4k/5k monitor) I'd recommend, on Windows 10, that you right mouse button the program, select Properties, then the Compatibility tab, click "Change high DPI settings", tick "Override high DPI scaling..." at the bottom of the next dialogue and select "System (Enhanced)", or if that doesn't work well then "System".
P.P.S. one other thing, sometimes they screw up and send English users an e-mail in German rather than English, just be laid back about it... it's part of their charm (err...)
P.P.P.S. I should also say never pay full price for their software but if you want something subscribe to their newsletter and wait for the (usually) inevitable deal.
Save | Cancel
JohnL, at least someone knows what there are doing.
thanks for the infow.
Save | Cancel