Every day we offer FREE licensed software you’d have to buy otherwise.
Giveaway of the day — COLOR projects 5 Pro (Win&Mac)
COLOR projects 5 Pro (Win&Mac) was available as a giveaway on December 14, 2022!
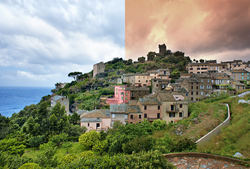
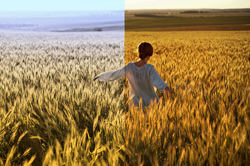
COLOR projects 5 offers unique new ways to transform digital color images into magnificent works of art - all with intelligently working tools in an efficient, crystal-clear workflow.
High-end image quality: new filters, new retouching tools;
Greatest creativity: 160 image suggestions and image montages;
Simplest operation: stand-alone and filter plug-in;
Suitable for 4K interface, GPS;
Time saver: quick sense of achievement guaranteed!
System Requirements:
Minimal: Windows 10/ 8/ 7, 32 bit, processor Core Duo, 2 GB free RAM, 2 GB HDD, screen resolution 1,280 x 1,024 pixels, graphics card: DirectX-9 compatible, 128 MB, 32 bit color depth; Mac OS X 10.7 or higher, 64 bit, Intel processor, 2 GB free RAM, 2 GB HDD, screen resolution 1,280 x 1,024 pixels, Retina 2,304 x 1,440 pixels
Publisher:
FRANZIS Verlag GmbHHomepage:
https://www.projects-software.com/deal/color-projects-5-professionalFile Size:
235 MB
Licence details:
Lifetime
Price:
$59.00
GIVEAWAY download basket
Comments on COLOR projects 5 Pro (Win&Mac)
Please add a comment explaining the reason behind your vote.

I took the Color projects 5 pro not long ago. So what is the difference this time?
Save | Cancel
John Liu, If it is the Pro and not standard version then I assume this is no different.
Save | Cancel
Franzis software never fail to disappoint for the price.
Save | Cancel
Mo, This is free, and I think more in the category of fun than pro software. Also never pay the full price as there is always a deal just around the corner, subscribe to their newsletter and wait a while (also check the deal is on the latest version).
I think their deconvolution sharpener is as good as anything else (I have Topaz Sharpen AI and Photo AI but use Sharpen Projects Pro in preference to them unless I want the image enlarged too, Sharpen AI just takes up disk space) also their B+W tool is perhaps the best out there, if occasionally annoying as there's so much in there. I'd rate HDR Projects Pro a bit below Aurora, but ahead of many other solutions.
Save | Cancel
Merry Christmas & Thank you...
Save | Cancel
Can be a fun thing to try a lot of looks on an image, don't take it too seriously. Here's a slightly updated of my longer take on it...
Here's a rough getting started guide (I have v6 now, so this is a bit from memory of the changes)...
As usual a complicated registration process if it's your first time with Franzis.
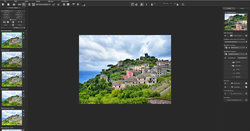
Load a picture, play with the canned effects on the left side, play with the Film Type on the right side panel (which should start on the “Finalise” tab).
The boxes at the top of the left panel just filter the effects that are listed in the panel, so ignore them initially. Although one use you might want to play with is, when you run down the presets looking for ones you like, you click the * beside them to mark them as favourites. When you're done click on favourites at the top to just show those (click "All" to return to seeing all the presets). This does mean with the next image you'll have to deselect ones that are already selected, if they aren't making the cut. Of course you could also use it just to slim down to a few general favourites.
Press and hold the right mouse button on the image to see the "before" image. Double (left button) clicking on the image zooms you all the way in/out (one after the other). A mouse scroll wheel also zooms. When not zoomed fully out the left mouse button can drag the viewing area around the image.
Changing to "Expert" in the right panel you can add filters from the list at the top, select them in the middle of the panel and tweak their effects at the bottom (may need scrolling down). (I'd ignore that until you are comfortable using it, or forever for that matter.)
On a faster computer you can use the Eye icon on the toolbar to disable the preview mode and show the final image in the main window, which IMHO is worth doing. (Although note items on the toolbar can disappear if the Window is too narrow to show everything. If you don't see something you think should be there make the program's window wider.)
When saving the final image note that the first dialog, where it asks for the title, is going to write that over the image, it isn't the file name.
The main disadvantage is the lack of Undo operations, you can set restore points though (which appear in a timeline).
The thing to get your brain around is it a huge pile of image processing tools, which are gathered together into presets in the left pane. All those options do is select a bunch of processing tools (as shown in "expert") and choose options for them, so they are infinitely tweakable in the right pane.
P.S. I believe this version is high-DPI (i.e. 4k/5k monitor) friendly. If you do have issues I'd recommend, on Windows 10, that you right mouse button the program, select Properties, then the Compatibility tab, click "Change high DPI settings", tick "Override high DPI scaling..." at the bottom of the next dialogue and select "System" or "System (Enhanced)" - see what works best for you.
P.P.S. Oh, and to add raw support for more recent (although not very recent) cameras:
Usually the GAotD releases come with an old Raw file import library (e.g. from 2014) so straight-out-of-the-box won't support more recent cameras. However you can just copy a later version of FreeImage.dll over the one in the program's directory to help with that (although it's still not completely up-to-date).
Look in "C:\Program Files\Franzis\Color projects 5 professional;" and see if it has an old version of FreeImage.dll, which is the library that decodes Raw images from your camera (you don't care if you only plan to use it with JPEGs). I replaced this with the newest version I have (once I've shut the program down so don't have a sharing error) which is:
FreeImage .dll 6924,800 .a.. 26-02-19
Alas usually you can download later versions from Franzis, but the downloads haven't been updated so you have to go to:
https://freeimage.sourceforge.io/download.html
and download the DLL (second link down the page)
Unzip the archive and choose the correct copy (x32/x64 - if you're running the 32-bit version of Windows your computer won't have a directory "C:\Program Files (x86)") of FreeImage.dll from FreeImage\Dist (which is 3.18.0.0, same as the one I used). I did install and test this exact file and it does work with supported cameras. You don't need the archive afterwards.
Note these are still not completely up-to-date, so recent cameras may not have Raw support and you have to use the JPG or make a 16-bit TIF file in your favourite Raw processing software (or just try 3-5 bracketed JPGs).
If you have a Mac you'll need to get the OSX version of FreeImage from SourceForge and replace the existing one, wherever it might be.
Save | Cancel